Tarmac King STL Pack


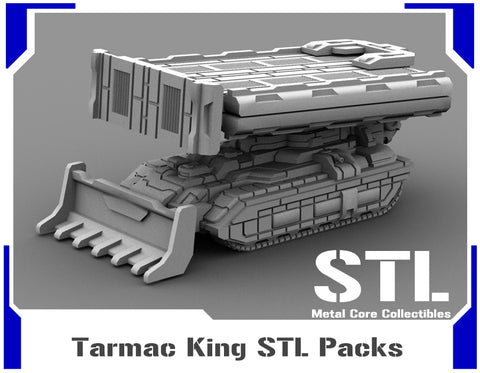


Boasting defensive weapons only, the TK-series, or "Tarmac King", is a departure from the normal Kodiak Heavy Tank in that it is not a front-line combat vehicle, but in fact a support unit. Carrying three 30-meter bridging units capable of supporting up to 90 tons, the TK1 is on paper a temporary bridging unit. The primary purpose for the TK Kodiak, however, is to typically work in groups of three to smooth out the terrain and lay down a combined 270-meter temporary landing strip for Aerospace Fighters.
Metal Core Collectibles files are all designed from the ground up with Resin-based 3D printing in mind. The Pack includes both Supported and Unsupported files. Although the supported files are the same as I use for producing my physical stock I simply cannot fully account for all the variables involved with different printers, resins, environmental factors and user practices. Some files will require that holes be carefully drilled using a Pin Vice or other small, manual drill, 'Pilot' marks are provided. When applicable parts will have small marks for where magnets can be installed to help with alignment.
Each of these packs maybe purchased individually, alternatively the "Full Pack" will always contain All Available files. In addition the Full Packs will also be updated in the event that additional variants are added to the Sprinter in the future. If you've already purchased, for example, a 'Sprinter STL Battle Pack' and wish to Purchase the Full pack, see the Terms and Services on STLs for information on how to Upgrade at a discount.
Full Pack
All available Variants are included in the Full Pack.
Notes The Tarmac King will require a 7/64"(~2.75mm) hole to be drilled into the Hull to fit the peg found on the turrets. A different sized hole can be used if you plan on magnetizing the the turrets and the hull.
Take great care when assembling and handing the Bridge Elements, it is recommended to only assemble them after painting and to not disassemble them once assembled. The hinges are fairly fragile and although the bridges can support themselves and a small amount of weight it is recommended to avoid resting any metal or particularly large and/or heavy miniatures.
To assemble the Bridge, take the center panel, and one of the large panels, hook one of the large panel's pegs into the notch on the center panel, then line up the second peg and gently but firmly push it into the center panel, this will carve out a small notch but the panel will still be secured. Repeat for the second panel to complete the bridge. AS mentioned before, it is best to paint the bridge parts first as repeated assembly and disassembly can damage or weaken the hinges to the point they don't function as intended.
Also Available as a Physical Product for those without 3D Printers!
By downloading the Tarmac King STL Pack you are acknowledging you have read our terms and services page located HERE